In this tutorial, we are going to walk through how to create ionic4 application.we’ll be covering how to create basic ionic4 application and folder structure of the generated application.
You need to go through the following steps in order to create an ionic4 application.
Get Started With Ionic4 :
Table of Contents
1) Install CLI
you can install ionic cli by running the following command.
npm i -g ionic2) Enable Angular Project Type
ionic config set -g features.project-angular true
3) Ionic Start
To generate an ionic app, run following command in the terminal and it will prompt to enter project name :
ionic start
I’ve given the project name as ionic4-demo, you can give it to anything you want and then press enter.
4) Choose Project Template Type
Then it will prompt you to select the project type.
There will be three option as follows:
- angular | Ionic Angular v4+
- ionic-angular | Ionic Angular v2/v3
- ionic1 | Ionic1
Select the 1st option because we are going to create ionic4 application and press enter.
5) Integration With Cordova
It will start creating necessary stuff to generate the ionic application and will prompt to integrate the app with Cordova, you can type y/N based on your need, I am entering “n” and hitting enter.
6) Automatic Dependency Installation
Then it will start installing all dependencies.
Note: It can be failed if it required administrative permission, in that scenario you need to install the package by navigating into project folder as following:
cd ionic4-demo <br />npm installDepending on your setup, you might need to add sudo in order to work with permissions.
7) Run Ionic App
If all packages are installed successfully then run the ionic project by running following command:
ionic serveIt may throw following error pointing that cannot find module ‘node-sass’,
that’s because your project is missing node-sass package and you can install it by running following command.
npm install node-sassand then again run the ionic project using ionic serve.
That’s it, we’ve created ionic4 application successfully.
It will generate an application based on what you’ve selected in project type options.
 |
| Side Menu |
 |
| HomePage |
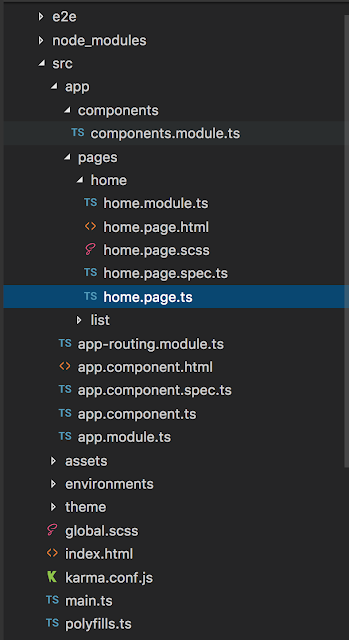
Project Structure
This structure follows the typical angular project and If you’ve ever worked with the angular project then you’ll be familiar with this structure.
We have a src directory that acts as the home for our webapp. This includes the index.html, any assets, environment variables, and any app specific config files.
Thanks for reading the article. Happy Coding 🙂
I hope you like this Get Started With Ionic4 article.
Also Read :
- JavaScript String Methods
- JavaScript Array Properties
- JavaScript Array Methods
- JavaScript Console Methods


